Photoshop is a powerful tool with many capabilities. It can be used to create amazing works of art, as well as everyday design elements such as ribbons. Anyone can create ribbon in Photoshop although it requires the knowledge of basic tools and techniques do it. In this article, we are going to break down how to create an eye-catching ribbon in Photoshop step by step so you can start adding stylish ribbons to your designs in no time.
Steps to Create Ribbon in Photoshop
Whether you are creating graphics for websites, blogs, or magazines, adding a ribbon design can take your design from ordinary to extraordinary. Creating a ribbon in Photoshop is a great way to add a modern, stylish look to your designs.
It’s very easy to change the color of the ribbon. Just double-click on the smart object symbol in the layers list.

New window opens with all the layers listed. Double click on the little dark red thumbnail and change the color to whatever you like.
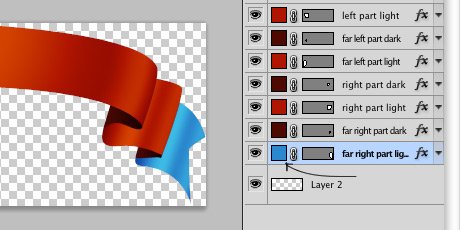
After you change colors of all the layers, go to File > Save, and then File > Close. And just like that, you should now have a pretty little ribbon with a completely new color scheme. Have fun!

In conclusion, the process to create ribbon in Photoshop is quite simple when you know the right steps. With the use of the Rectangle Tool, Shape Layers, and Layer Styles, you can create realistic ribbons with ease. Customizing color, lighting effects, drop shadows, and other elements will make your ribbon stand out even more. With practice and experimentation, you can quickly become an expert at making ribbons in Photoshop. So why not try your hand at it today?
Source: 365psd.com